Showing posts with label How to. Show all posts

Friday, September 12, 2014

How to Post Facebook Status or Tweets In The Future.

Have you ever wanted to update your Facebook status at a future time and date when you may not actually have the time to do it? Have you ever wanted to Tweet in the future, but type it now in the present? Perhaps send out a reminder for an upcoming event that you are organising or managing?

Here’s One of the Simplest Trick on How to Post Facebook Status or Tweets In The Future.

Postcron is a web-based fee app that allows you to schedule Facebook status message and twitter tweets at the predefined time and date in the future.

The Postcron Site.

To use this app start your browser, connect to POSTCRON and sign in to your Facebook account.
You will need to select the time zone that you are in, so that Postcron can accurately update your Facebook status in the future at a predefined time and date specified by you.

Once you have connected the Postcron app to your Facebook account, you can specify what message you wish to post on your Facebook account and at what future time and date. Click on Schedule and let Postcron do the rest. Not only can you schedule plain text updates in the future, you can use Postcron to send out updates with photos and links as well.

Schedule your Facebook Status on Postcron

You can also connect Postcron to your Twitter account and Facebook pages that you manage and send out updates or messages in the future.


There are several other apps that allow you to update your social networking websites in the future.
Here are some of the Examples:

How to Post Facebook Status or Tweets In The Future.

Tuesday, August 12, 2014


If you want to use Google faster, better and more exactly than ever before, you can use some simple search tricks, tips and twists that the only expert searchers on Google know. Most people use Google by just typing in the keywords they want to search for, and then clicking on the search results that are showed. But there is a lot more to Google than just the commonly used keywords-based search task. Depending on what you want to do, it is possible to use Google Search shortcuts to rapidly access the material that you want.

So Here’s How to Google like a Boss.

1. Definitions

If you are writing an email to client or reading an article online and want to find out the exact definition of a specific word you can simply type define:technology.

2. Movies

If you want to make a weekend plan with your family and ant to check which movies are playing in your city and maybe even see they trailers online, Google will automatically sense your current location and will look up movies playing in you city. All you have to do is type: movie.

3. Flight status

If you are on a business trip and want to find out the gate information for your flight and whether it is on time or not mere type your flight name.

4. Recipes

If you want to find a particular recipe, just go here and type the name of your favorite dish.

5. Unit Conversion


If you are measuring your room in preparation for a makeover or want to figure out how cold it really is when your cousin in US tells you the temperature in Fahrenheit, let Google covert innumerable measurement units from one type to another. Unit conversion allows users to covert temperature, length, mass, speed, time, area, volume and others. For Example you type Dollars to Rupees.

How to Google like a Boss.

Saturday, August 9, 2014

Recover Deleted Files. Image Source: Internet

Have you ever accidentally deleted some unforgettable photos from your computer, camera or pen drive? Have you ever lost essential files because of a system or software crash? Let us assume the worst case scenario- that you accidentally deleted a file and then emptied your recycle bin as well. How do you recover the file now? In such circumstances, the trick to be able to recover deleted files could be a lifesaver.

So Here's How to Recover Permanently Deleted Files.

Generally, once a file has also been deleted from the recycle bin, it can no longer be accessed by windows, but still remains somewhere on your hard drive in the form of ‘Dead files’. Normally, such dead files remain on your drive for a number of days (Sometimes even for weeks or months) until they are overwritten by new files or data that you create on your system. Luckily, such dead files, although considered out-of-the-way to the normal user, can in point of fact be recovered using data-recovery tools like Recuva, available as a free download from here.

Once you realize that you have accidentally deleted or lost important data, it is recommended that you start the recovery process as soon as possible, to prevent the deleted files from being overwritten accidentally.
Once you have installed Recuva on your system, the Recuva Wizard will automatically start. The interface of the Recuva Wizard makes it very easy and straightforward for you to recover your deleted files. Just follow the guidelines on the screen and click on the next button to continue.

Recover Deleted Files Using Recuva


At the next screen, you need to select the type of the file you have accidently deleted that you hope to recover and click on the Next button. The more precise you are in terms of the file information you provide to Recuva, the better are your probabilities of being able to recover the files.

Recover Deleted Files Using Recuva


Now you need to select the location where the files was before they were deleted. You can choose a precise folder on your computer or external drive (Hard drive, pen drive, camera or iPhone), or even the entire system in the event you are unable to remember the exact location. Click on the Next button to continue.

Recuva will now search for all available dead files in the folder that you have selected. Normally, the scan does not take more than a few seconds.

Once Recuva has found the dead files, it will investigate them to figure out how damaged they are. If the dead files have already been written by new files, it may not be possible to recover them. Otherwise, most of the dead files that are found will be easily recovered.

You need to now select the files you wish to recover from the list of dead files that Recuva finds, and then click on the Recover button.


Recover Deleted Files Using Recuva

Within a few seconds, Recuva will recover the selected dead files, and will allow you to save them anywhere on your computer. It is suggested that after recovering the files, you should save them in a drive other than the place where the original files were located. Once you install Recuva on your computer, you can delete your files confidently because you know you can get them back.  

How to Recover Permanently Deleted Files.

Thursday, August 7, 2014

How To Send A Secret Message That Will Self-Destruct In The Receiver’s Inbox.

Ever wanted to be a secret spy of some country who is on a very important mission to save the world. Well I don’t know how you can be a spy but I certainly know how to make you feel like one. A private message is sent to a top secret agent, the agent reads it and then the message self-destructs, yeah just like the one in Mission Impossible franchise.

You know what, even you can send the same type of self-destructing message but obviously it won’t destruct itself in the dramatic way that is shown in the movie.

So Here’s a guide on How to send a secret message that will self-destruct in the receiver’s inbox.

Sometimes you need to share private information like password, credit card details or bank account information with a family member, friend or coworker. It is possible to simply send the personal information via email or a chat message to the receiver. Still, there is a risk that they might forget to delete the messages and your private information may still stay in their inbox or computer. This means that a mischievous user, who accomplishes to illegally access the receiver’s computer or account in the future, could possibly access your private information and misuse it. Wouldn't it be awesome if you are able to share your private message with the receiver by means of a self-destructing message which automatically gets deleted once it has been read?

Burn Note Site
There is a very website known as Burn Note which can be very handy. It permits a user to send a message to someone else in such a way that the message will be automatically deleted instantly or after a predefined number of seconds after it has been read. This makes sure that your messages remains in point of fact secretive and cannot be retrieved by anyone after it has been transported to the wished-for addressee.

In this example, let us assume that a family member needs your credit card number for an urgent purchase and you wish to share in the form of a protected self-destructing message.

All you need to do is merely start your browser and connect to Burn Note Website and type the private message of your choice in the space provided.

Options For Secret Message That Will Self-Destruct In The Receiver’s Inbox. Burn Note

For further security, it is not only possible to stop the receiver from being able to copy your private message, but also to put a password on the self-destructing message. This gives you twice the protection against unapproved access to your private information. Besides, Burn Note also permits you to specify the number of seconds after which the private message will robotically self-destruct.

Click on the Options button to access all the different options offered to you while generating the private message.

When you are done writing the private message and choosing the several options related to it, Click on the Send button. Burn Note will now generate a URL or link to a special short-term web page where private message will be stored.

To share the message with your friend, you only need to send this link to your friend by means of email, chat or Whatsapp.

When the receiver opens the link, they will be taken to the special short-term web page where your private message has been stored. On the other hand, they won’t be allowed to view the private message without entering the password if you chose to set one.

Secret Message That Will Self-Destruct In The Receiver’s Inbox Sent via Burn Note


Only when the correct password is entered will the receiver be allowed to view your private message. The greatest part is that the private message can only be used once and will be automatically erased after the predefined number of seconds.

The receiver of your private message also has the choice to reply to your message with another self-destructing Burn Note private message from right within your message.

Burn Note Mobile app is also available. Some other widespread websites that allow you to send similar self-destructing messages are:


How To Send A Secret Message That Will Self-Destruct In The Receiver’s Inbox.

Wednesday, August 6, 2014


So you are the one who is really desperate to watch some pornography, huh! Too bad the sites are blocked. And now that you have tried to open such sites it gave a report to the cops and they are on their way. NAH! I am just messing with you. But don’t try to get access to such sites they are full of viruses.

Also Read: How to Boost your Phone's Volume with a Simple Trick.

Nowadays our favorite websites like Facebook, Torrent, YouTube and others are becoming blocked in many colleges, schools and workplace for college students & employees. There are several tricks out there to open blocked websites. Now I am going to tell you 8 useful tricks on how to access websites that are blocked at your college, schools or workplace. 

So How To Access Blocked Websites At Your College or Workplace.

Answer is by using Proxy Servers.

Proxy websites are online proxy servers. A proxy server is a means to indirectly access a website with the help of a browser to hide the location of the user. It accepts the request of a particular web page, processes the request, gets the required web page and displays instantaneously back to the user.
In other words, a proxy server is a way to bypass filters and get access to blocked websites on the internet.


Web servers not only allow you to blocking censors, they also guard your IP address or identity, giving you complete concealment on the Internet. Proxy servers acts as a mask for you as you surf the internet. One of the most widespread proxy server on the Internet is a website called Anonymizer, which allows you anonymous access to blocked websites on the Internet. Here's the link http://www.anonymizer.ru/

As the name suggests, this is a Russian website. There lot of real-world advantages of using a Russian website. Most Russian websites are free and more notably, most of them are totally anonymous and do not preserve any records of their users’ activities.

Once you have connected to Anonymizer, type in the address of the website you need in the space provided on the top right corner of then screen, click on whatsoever looks like ‘Submit’ button.

For example, if you type https://www.google.com. Anonymizer will connect you to Google website, fetch the webpage and display it on your screen, Google will record that someone from Russia is connecting to it, but not your IP address. From the other side, your local network administrator will record that you are simply connecting to Anonymizer website, and not to Google.

If you use Anonymizer from www.anonymizer.ru or www.anonymizer.com repeatedly enough, sooner or later your network administrator will block them as well. But the good news is that there are thousands of such web proxies available on the internet. Some of the most popular and consistent ones are mentioned below.


How To Access Blocked Websites At Your College or Workplace.

Tuesday, August 5, 2014

How to Download Videos From Youtube.

With more than 2 billion videos viewed on every day, YouTube has reached new heights. YouTube has been aimed to only allow users to watch and view videos on their website. Many users want to save their beloved videos to their computer so they can watch them on other devices or so they can watch them without being connected to the Internet. Wouldn't it be amazing if could download YouTube videos?
 

So Here is a guide on How to Download Videos From Youtube.

There are a number of video downloading sites like Savevid, Keepvid and Zamzaz that permits you to download and save videos from popular video streaming websites. All you need to do is just copy-paste the URL of the video that you wish to download into any of these video-downloading websites. You can also choose the format you want the downloaded video to be in.


For instance, start your browser and connect to Savevid. Enter the URL of any video that you wish to download in the space provided and then click on download. The website will regain the videos and you will be asked to download it in any format you want like .flv, .mp4 etc. Choose the desired format and then click on the Download button in order to start your download.

Savevid website

If you want to abstract and download just the audio from a video that you are watching on YouTube then VidtoMP3.com will be very helpful. Once you connect to this website, just copy-paste the URL web address of the video from which you desire to extract and download just the audio portion and then click on the download button. And you are done.

Watching a FLV video on your computer

If you've saved the file as a .flv file, you'll require a player that supports .flv files. Below are a few recommendations.

VLC media player

Windows Media Player


Microsoft Windows users also have the capability of playing FLV files in Windows Media player with the right codec. Downloading and installing the CCCP codec installs this codec, as well as other codecs because you'll probably need them in the forthcoming.

You can read more such Tricks here.

How to Download Videos From Youtube.

Monday, August 4, 2014

Simple Tricks to Improve your iPhone's Battery Life.

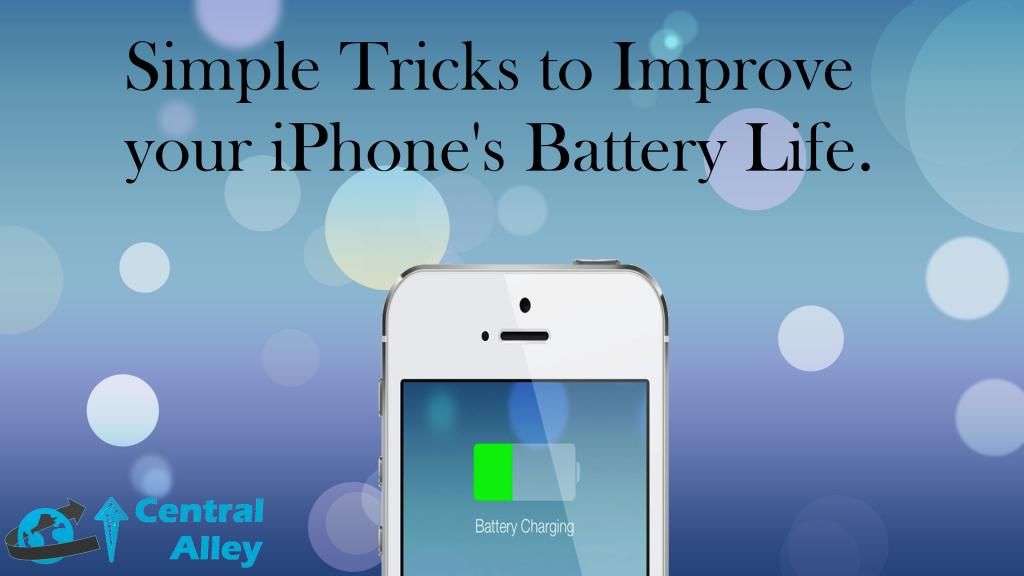
Want to improve your iPhone's battery life? Sick of running out of juice around 8pm? Follow these tricks for all-day iPhone battery life

What is the most essential technology to any smart phone? It’s not the screen quality or size. It’s not the storage space or looks. It’s the battery backup. Because without a good battery backup it doesn’t matter how advanced your phone is, because if won’t work for too long. That’s the reason why iPhone is the most awesome device in the world for the first half of the day, and a great trouble for the latter.But I’ve started using a number of tricks to make my battery life last longer.

These tricks will not only enhance you battery life, but also improve the general performance of your much-loved iPhone. Most of the tricks listed below are simple to put into practice and should.

Here are few Simple Tricks to Improve your iPhone's Battery Life.


Those Motion Effects. Stop them.

The parallax effect is the name given to the faintly moving icons and notifications in iOS 7 when you move your iPhone. Apple fashioned the parallax effect to give the flat icons some depth. On the other hand, as with any process that requires movement, the graphic capabilities needed to do this suck up battery life. In order to disable this effect go to Settings > General > Accessibility > Reduce Motion > and toggle the switch to ON (green).

Disable the Dynamic Backgrounds.

An additional motion feature in iOS 7 is the dynamic backgrounds. These are the wallpapers that have slight motion in them. They look great, but that motion is sucking into your valuable battery life. It’s most excellent to use a still image for your wallpaper. To do away with of the dynamic images go to Settings > Wallpapers & Brightness > Choose a New Wallpaper and select a wallpaper from the “Stills” selection.

Turn on the Auto-Brightness.

Increased screen brightness takes up a great amount of battery life. This is because the added light required to light up your screen requires a lot of energy, exhausting your battery faster. Screens commonly require less light in darkness and more when it’s bright outside. To adjust your iPhone’s brightness levels automatically go to Settings > Wallpapers & Brightness > and toggle the Auto-Brightness switch to ON (green).

Or Reduce the Screen Brightness Manually.

 If Auto-Brightness isn’t doing great for you, you can always set the brightness levels on your own. Go to Settings > Wallpapers & Brightness > and decrease the brightness level by adjusting the slider. This will help you in a big way to save your battery backup up to a great extent.

Turn Off the Bluetooth.

The most recent iPhones have Bluetooth 4.0, also known as Bluetooth Low Energy, or BLE. And while BLE uses a lot less power than previous versions of Bluetooth it still takes up power unnecessarily when you leave it on and don’t plan on connecting to any Bluetooth devices. To quickly switch Bluetooth off simply bring up the Control Center. Click the Bluetooth button so it turns black. This disables Bluetooth.

Turn Off Wi-Fi.

Wi-Fi is another connection tools we usually don’t need when out. It’s more essential when we are in our home or office, as using Wi-Fi doesn’t drain into our data plans. But keeping it enabled all the time means our phones are frequently looking to join Wi-Fi networks as we roam across the city or take a trip on the train. The result is low battery backup. To quickly switch Wi-Fi off simply bring up the Control Center. Click the Wi-Fi button so it turns black. This disables Wi-Fi.
 

Stop Background App Refresh.

Background App Refresh is a feature in iOS 7 that enable apps to learn when you regularly check them. This allows the apps to calculate when you'll next check them and sees them craving their servers right before you do so they can pull the latest data and have it ready and waiting for you when you open the app. It’s a really versatile feature with the exception that it leads to draining your battery since these apps are running in the background.

To disable Background App Refresh go to Settings > General > Background App Refresh >  and toggle the switch to OFF (white) or toggle individual apps ON or OFF.

Switch Off App Location Services.

Location Services allows apps to know where you using GPS coordinate or Wi-Fi triangulation. This is helpful for a number of apps, but it sucks all the battery power.

To save battery go to Settings > Privacy > Location Services > and toggle the switch to OFF (white) to turn off all Location Services (not recommended) or toggle individual apps access ON or OFF.

Turn Off System Location Services.

Just because you’ve tweaked every app access to Location Services doesn’t mean you can’t get some further battery savings from disabling the feature in other places. The core of iOS uses Location Services for many other purposes and some of them are absolutely meaningless. You don’t need them! So turn them off.

Settings > Privacy > Location Services > and scroll down until you see System Services. Tap that and toggle the switches to OFF (white) to disable individual system Location Services. I suggest disabling Diagnostics & Usage and Location-Based iAds.

Turn Siri Off.

Siri is always functioning in the background as a default on iOS 7. She’s just sat there waiting for you to speak to her meaning she’s always using up a little amount of battery in the background. It’s not helpful, particularly if you don’t use her, plus it isn’t hard to just turn her on by yourself.

You need to head into Settings > General > Siri and then turn off the Raise To Speak feature. Now you can’t call her to get into Siri but you can still do it with the home button.
 
There is an option to switch your iPhone battery to display as a percentage in its place. It’ll facilitate you keep a proper eye on the battery you’ve got left on your phone and know when to act with the tips above.

Simple Tricks to Improve your iPhone's Battery Life.

Saturday, August 2, 2014

Boost your Phone's Volume with a Simple Trick.

There are a huge number of D.I.Y object on the internet, some better than the others. I read several such articles every day, exclusively for the sake of increasing my knowledge reservoir of difficult to understand solutions. Every now and then, one or the other seems so simple and easy that it makes me believe that I am the biggest idiot for not thinking of that.

Here I am going to reveal a couple of such tricks.

How to Boost your Phone's Volume with a Simple Trick. 


If you crave to boost the volume of the music or audio from your Mobile device, then here’s an awesome do-it-yourself key created by @nnnnnnnn a Twiiter user.


All you need is two plastic cups and a paper towel roll.

Image posted by the Twitter user mentioned above.


I gave it a shot, and found that it really works. IT REALLY WORKS.

 In my case [for Sony Xperia P] i had to keep the cellphone upside down as its speakers are at the right top side. It doesn’t really sound better, but it did make it louder, but i notice that you can make it sound better by merely adjusting the music equalizer.

This is a very useful as well as helpful way out if you don’t want to buy a speaker for your device.
And you can always give it a cool exterior design (provided that you are talented enough).


The next trick is very simple and you have probably tried it. Equipped with nothing but a simple glass, you can double the sound coming out of your smartphone. But does it sound better? Obviously No, Duh! It‘s not like it’s a substitute for the cheapest of speakers in the market. But if you ever find yourself situation where you will need a loud sound for instance needing to blow up a conference call just a little then this simple yet powerful trick may prove handy.
 
ImageSource: Internet

How to Boost your Phone's Volume with a Simple Trick.


It’s been a while since Canonical has been developing Ubuntu for Devices. Regrettably, it’s not so simple to install it. Yet, if you've want to make an effort for it then dual-booting your Nexus Device.

Lately, Canonical announced an update to its Ubuntu Dual Boot app with the help of which you can dual boot Ubuntu and Android. This means that not only can you check out Ubuntu without experimenting on your phone, but you can see all the new updates as they take place without much mess.
Warning:  As of now Ubuntu for Devices is still under developed condition, and it is almost certainly not a complete package to full in your daily needs. This is the reason why we are about to Dual Boot Ubuntu on Your Android Device. Obviously, you should be expecting some bugs in the OS.

First, apps in Ubuntu uses HTML5, but a number of apps on the platform are in fact just the regular mobile sites. Some apps may ask you to install an Android app when you start them. Do not install them as Ubuntu is not built on Android and Android apps won't work on it. Challenging this and trying to install them or even opening a link to the app can make a mess.

Second, you will need a laptop or PC running Ubuntu because this procedure requires the desktop version of Ubuntu to install the mobile OS on your Android device.  Here are directions for installing Ubuntu together with Windows: How to install Ubuntu using a USB flash drive.

How to Dual Boot Ubuntu on Android:


Enable USB Debugging.


First, you must enable USB debugging on your phone or tablet.
Here's how to do so:

  • Open the Settings and select "About phone."(Or About Tablet)
  • Click "Build number"  7 times to enable developer mode.
  • Go back to the Settings menu.
  • Tap the just this minute available Developer options.
  • Check USB debugging to enable it.
  • Once that's done, connect your tablet/phone to your computer with a micro USB cable.


Installing the Ubuntu Dual Boot App.


Next, download the Ubuntu Dual Boot installer script from here to your home directory. Then follow these instructions:

  • Open a Terminal window by pressing Ctrl+Alt+T all together.
  • Run the following command to make the script executable:     chmod +x dualboot.sh
  • Execute the script by running the following command:     ./dualboot.sh

Note: In my experiment with a Nexus 7 on a fresh Ubuntu install, the script got trapped in a loop attempting to execute a curl command (as shown below). If this occurs to you, close the Terminal window, open a new one, and run the this command to install the package: sudo apt-get install curl This will install the essential component. Once that's complete, run the dual boot installation script again.


Downloading and Installing Ubuntu for Devices.


The script will run involuntarily and will reset your device a number of times. Once this is complete, your phone or tablet should boot back up to the Android home screen. Now, open the new Ubuntu Dual Boot app from your app drawer and then:

  • Click "Choose channel to install."
  • Choose a download channel (Canonical recommends "utopic").
  • Click "Grant" when prompt for super user access.
  • Once Ubuntu has completed downloading and installing, click Reboot to Ubuntu.
  • Well Done! You now have Ubuntu running on your phone or tablet.
  • How to Switch Between Android and Ubuntu
Also Read: 15 Google Search Tricks and Tips to Make Web Browsing Easy.

Nothing like many other dual boot solutions, you don't select which operating system you want at begin. As an alternative, once you've booted into Android, start the Ubuntu Dual Boot app and click "Reboot to Ubuntu". Your device will then restart into Ubuntu. Regardless of which OS you're in, a hard reset will always boot to Android. This is generally performed by holding down the power button for about ten seconds. There's also a Dual Boot app in Ubuntu for switching back to Android if you wish.


You can also update Ubuntu from either the Ubuntu Dual Boot app in Android or from the system settings in Ubuntu. Nevertheless, both methods require you to be in Android to actually install the update, so it's almost certainly best to just boot into Android first when it's time to update anyhow.

How to Dual Boot Ubuntu on Android.

Friday, August 1, 2014


Want to try Ubuntu on your PC or laptop, just download the Desktop Edition from the Ubuntu website. Click the Download link in the menu at the top, then click the Download and install button. Use the drop-down menus to select the version you want.


How to install Ubuntu using a USB flash drive.

We suggest using a 4GB USB flash drive and downloading the Universal USB Installer utility to install Ubuntu. Run the utility (it runs directly in Windows from the executable file you downloaded) and make sure you select the suitable version of Ubuntu from the listing. After that, direct the utility to the location of the ISO file on your hard disk and, at last, choose the right drive on which to install it.

Ensure that you've backed up the files on the flash drive, as it will wipe out them. Likewise, back up the files on the computer onto which you're installing Ubuntu, even if you are planning to install it as a secondary OS


You can insert USB drive into a free port on the computer which will run Ubuntu, after all the files have been written to the USB drive. If the computer doesn't boot from the flash drive, you'll need to modify the order of the boot devices in the BIOS. You can enter the Bios by pressing Del, F1 or another key that's shown on the screen at boot time.


Follow the on-screen directions when Ubuntu loads - it will sense if another operating system is there and provide options about how to install Ubuntu. If you want to throw away Windows and make Ubuntu the only operating system, we advise selecting the 'Something Else' option and deleting the Windows partition on your hard disk. You'll also need a 'swap' area, which should be double the capacity of your computer's memory.

If you're common to partitioning Windows disks, it's a little confusing when doing the same in Linux. As a substitute of referring to drive letters, you'll see disks and drives shown as hda or sdb, etc. Hda refers to the first IDE disk - the second would be hdb. Modern hard disks which connect via SATA or even USB are called sda, sdb, sdc, etc. Each primary partition is numbered 1 to 4 and each logical partition from 5 upwards. Confirm you're certain of which disk and partition you're trading with before performing the changes. Partitioning take place only when you click the install button.

The partitions you require for Ubuntu are: root, home and swap. Root is where Ubuntu is installed, and should be at least 4GB. Select ext4 as the file system and / as the mount point. The home partition is where your files are kept, and should be sufficient enough to have a room for everything you plan to store. For a second time, select ext4 as the type, and /home as the mount point. The swap partition should be twice the capacity of your computer's memory, so if it's 2GB, then create a 4GB swap partition. Choose swap as the type - there's no mount point. 


At the time of installation, you'll be prompt for a few details together with your location, language, username and password. It's suitable to have your computer connected to a network, and you'll be asked to choose a Wi-Fi network if no Ethernet cable is connected. This makes sure the latest updates are installed.


Once installation is done, remove the flash drive and press Enter. Your PC will restart and launch Ubuntu. Go to the Software Centre (the shopping bag icon at the bottom of the dock) and you can install your favourite applications including Chromium (the Ubuntu’s answer to Google Chrome), Skype, Dropbox and others.


How to install Ubuntu using a USB flash drive.

Sunday, July 27, 2014


Candy Crush Saga put forward a very addictive game play but sometimes the 5 lives you got while playing aren’t enough. After which you require to wait for hours to get your lives back or else you have to reach out for help from your Facebook friends which becomes somewhat annoying particularly when you are continuously losing your lives at a faster rate. But there is a solution to this. 

Also Read: Samsung Launched 7-inch screen Galaxy Tab Q.

This guide will teach you How to get free unlimited lives in Candy Crush Saga on your Apple iPhone, iPad or Google Android Devices. Check below how to get free extra lives in Candy Crush Saga.

How to Get Free Unlimited lives in Candy Crush Saga?


For Apple iPhone, iPad and iPod Devices :


  1. Go to Settings -> General -> Date and Time Settings and Change the Set Automatically option to OFF as show below in the image. 
  2. Here adjust your system date and time ahead either by 2-3hrs or 1 day depending upon the refilling waiting time of candy crush saga.
  3. Open Candy Crush Saga and you will gain 5 extra lives but don’t start playing right away, wait for synchronization.
  4. Once the synchronization is done you can reset your date and time by heading for Settings -> General -> Date & Time and set automatically to the option ON.
  5. And voila... you are all done start having the benefit of free unlimited lives in candy crush saga by repeating the same course of action again and again. 

    Also Read: Why 5.5-inch iPhone 6 is delayed and won't be launched with 4.7-inch iPhone 6 in September.

For Android Device :


  1. Open your Android Phone Settings -> Find the way to Date and Time and Here Uncheck the Option Automatic Date and Time.
  2. Now change your system date and time ahead either by 2-3hrs or 1 day depending upon the refilling waiting time of candy crush saga.
  3. Start Candy Crush Saga and you will gain 5 extra lives but don’t start playing right away, wait for synchronization.
  4. Once the synchronization is done you can reset your date and time by Going to Settings -> Date & Time and Check mark the option Automatic Date and Time.
  5. And voila... you are all done start having the benefit of free unlimited lives in candy crush saga by repeating the same course of action again and again.


Alternative :  

(In case you are having troubles with Candy Crush Saga after following the trick mentioned above)

It has been seen that few users faced some problems because of improper setting of date and time or by playing candy crush saga just after changing the dates. This resulted them to wait for even longer time phase. If you face such issues don’t worry try the following steps.

  1. Go to your android settings -> Installed Apps -> Select Candy Crush Saga -> Delete Data
  2. Go back to Candy Crush Saga and Login to Facebook and you will get extra 5 lives again.


Note – This can be accomplished only if your candy crush saga and Facebook are sync together.

Besides you can always uninstall and reinstall Candy Crush if you have some serious problem.

How to Get Free Unlimited lives in Candy Crush Saga?

Subscribe via Email