It’s been a while since Canonical has been developing Ubuntu for Devices. Regrettably, it’s not so simple to install it. Yet, if you've want to make an effort for it then dual-booting your Nexus Device.
Lately, Canonical announced an update to its Ubuntu Dual
Boot app with the help of which you can dual boot Ubuntu and Android. This
means that not only can you check out Ubuntu without experimenting on your
phone, but you can see all the new updates as they take place without much mess.
Warning: As of now Ubuntu
for Devices is still under developed condition, and it is almost certainly not
a complete package to full in your daily needs. This is the reason why we are
about to Dual Boot Ubuntu on Your Android Device. Obviously, you should be
expecting some bugs in the OS.
First, apps in Ubuntu uses HTML5, but a number of apps on
the platform are in fact just the regular mobile sites. Some apps may ask you
to install an Android app when you start them. Do not install them as Ubuntu is
not built on Android and Android apps won't work on it. Challenging this and
trying to install them or even opening a link to the app can make a mess.
Second, you will need a laptop or PC running Ubuntu because this
procedure requires the desktop version of Ubuntu to install the mobile OS on your
Android device. Here
are directions for installing Ubuntu together with Windows: How to install Ubuntu using a USB flash drive.
How to Dual Boot Ubuntu on Android:
Enable USB Debugging.
First, you must enable USB debugging on your phone or
tablet.
Here's how to do so:
Here's how to do so:
- Open the Settings and select "About phone."(Or About Tablet)
- Click "Build number" 7 times to enable developer mode.
- Go back to the Settings menu.
- Tap the just this minute available Developer options.
- Check USB debugging to enable it.
- Once that's done, connect your tablet/phone to your computer with a micro USB cable.
Installing the Ubuntu Dual Boot App.
Next, download the Ubuntu Dual Boot installer script from
here to your home directory. Then follow these instructions:
- Open a Terminal window by pressing Ctrl+Alt+T all together.
- Run the following command to make the script executable: chmod +x dualboot.sh
- Execute the script by running the following command: ./dualboot.sh
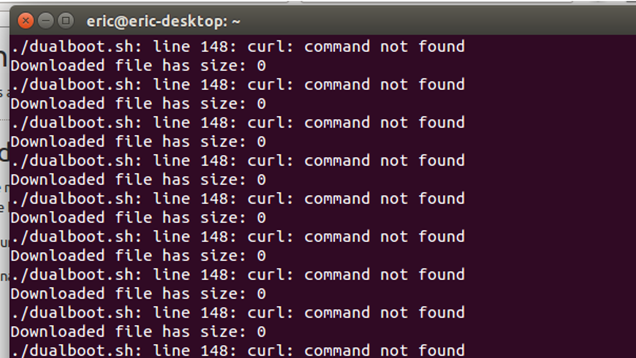
Note: In my experiment with a Nexus 7 on a fresh Ubuntu
install, the script got trapped in a loop attempting to execute a curl command
(as shown below). If this occurs to you, close the Terminal window, open a new
one, and run the this command to install the package: sudo apt-get install curl
This will install the essential component. Once that's complete, run the dual
boot installation script again.
Downloading and Installing Ubuntu for Devices.
The script will run involuntarily and will reset your device
a number of times. Once this is complete, your phone or tablet should boot back
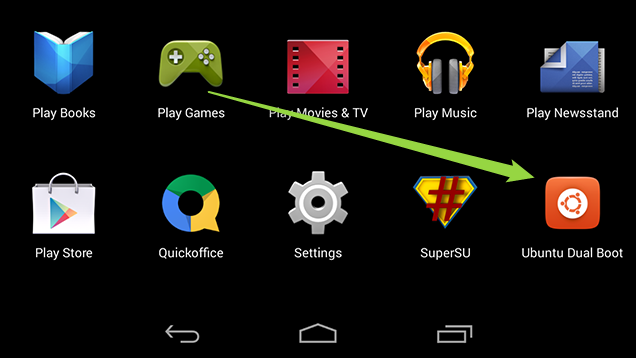
up to the Android home screen. Now, open the new Ubuntu Dual Boot app from your
app drawer and then:
- Click "Choose channel to install."
- Choose a download channel (Canonical recommends "utopic").
- Click "Grant" when prompt for super user access.
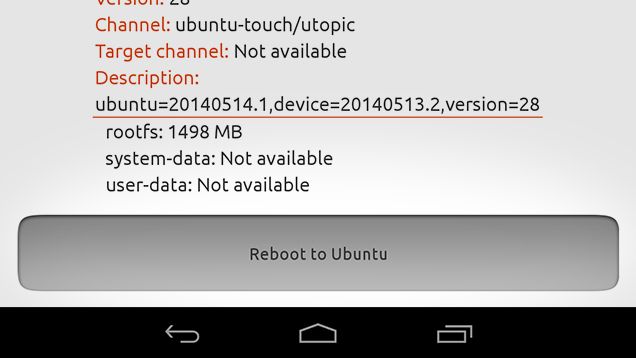
- Once Ubuntu has completed downloading and installing, click Reboot to Ubuntu.
- Well Done! You now have Ubuntu running on your phone or tablet.
- How to Switch Between Android and Ubuntu
Nothing like many other dual boot solutions, you don't select
which operating system you want at begin. As an alternative, once you've booted
into Android, start the Ubuntu Dual Boot app and click "Reboot to
Ubuntu". Your device will then restart into Ubuntu. Regardless of which OS
you're in, a hard reset will always boot to Android. This is generally
performed by holding down the power button for about ten seconds. There's also
a Dual Boot app in Ubuntu for switching back to Android if you wish.
You can also update Ubuntu from either the Ubuntu Dual Boot
app in Android or from the system settings in Ubuntu. Nevertheless, both
methods require you to be in Android to actually install the update, so it's almost
certainly best to just boot into Android first when it's time to update anyhow.


0 comments:
Post a Comment