 |
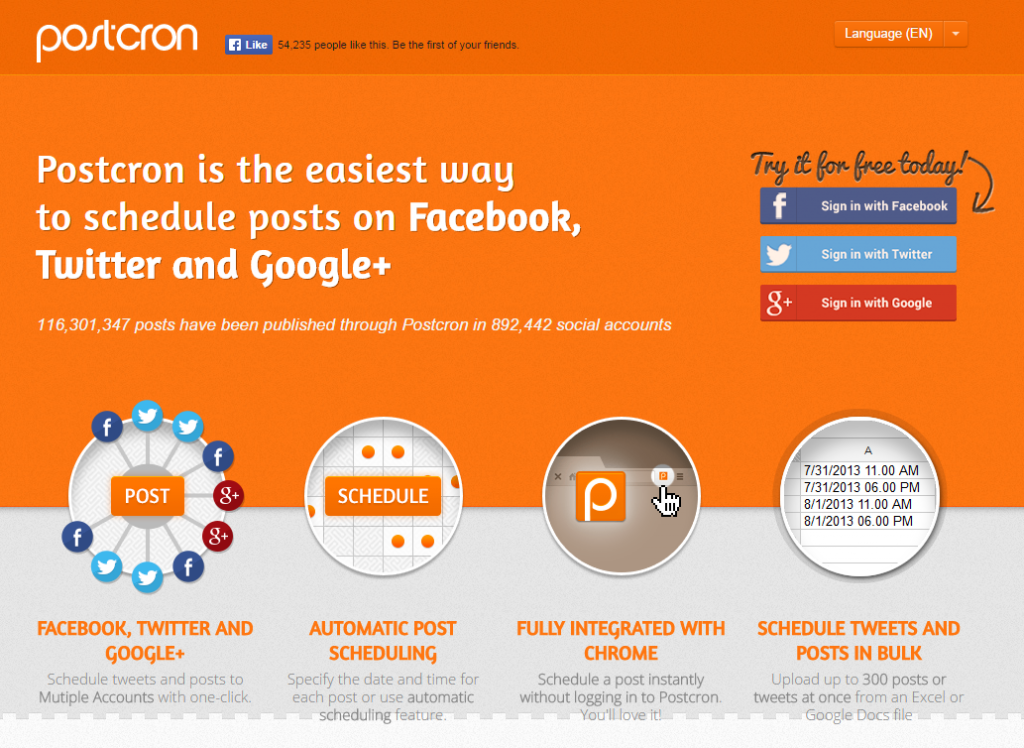
| 15 Google Search Tricks and Tips to Make Web Browsing Easy. |
So you think you know how to
Google stuffs? Let me tell you what, you don't know how to Google.
Even the most experienced
individual might not know every
Google search tip and trick available with just
a small number of additional keystrokes in the search bar. Believe this as your
instructions manual for the world's most accepted search engine.
Here are 15 Google Search Tricks and Tips to Make Web Browsing easy and find
what you’re really searching for.
Also Read: 13 Interesting Facts About Google That You May Don't Know.
1. Make use of hyphens.
 |
| 15 Google Search Tricks and Tips to Make Web Browsing Easy. |
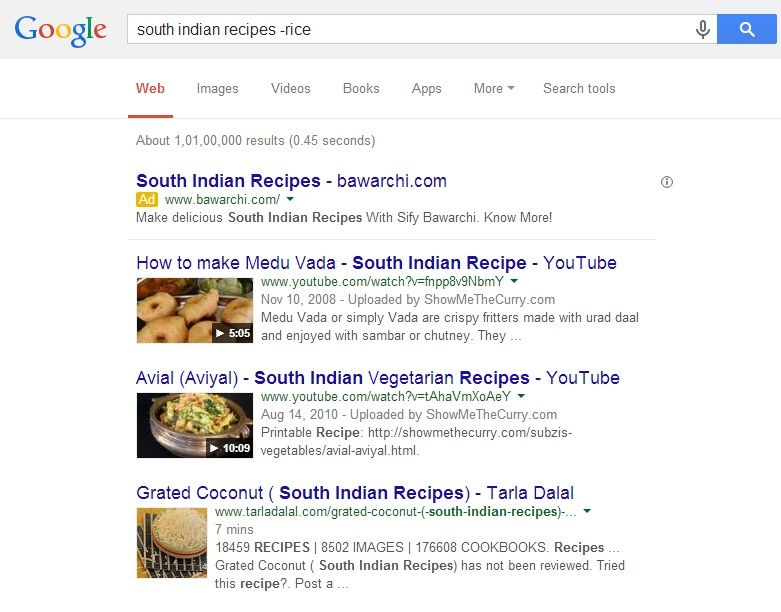
Google does identify some symbols to perform specific
actions. For example, if you use hyphens in a search, it tells Google to eliminate
that word from the search. In the image above you can see that I searched for South
Indian recipes without rice and Google gave me a lot of recipe results that
have no rice. It’s uncomplicated and helpful if you’re looking for something particular.
2. Make use of quotes.
 |
| 15 Google Search Tricks and Tips to Make Web Browsing Easy. |
Every now and then you require searching for a specific
quote. Normally, Google uses the words you enter into a search to check entire
documents. If you search Google tricks and tips it will look for anything that
has those words, but not essentially in that order. If you make use of quotes,
you find
Web Pages that have those precise words in that specific order. This is
for the most part useful for things like song lyrics.
3. Make use of the tabs.
 |
| 15 Google Search Tricks and Tips to Make Web Browsing Easy. |
When you search you have the option of lessening your search
based on the category of thing you searched for. The tabs in general show Web,
Images, News, Videos, Maps, and More. If you’re looking for a latest news updates
you should try clicking the News tab. If you want to search an image, try the Images
tab. Under More tab, you will find some more dedicated things like books and
Apps.
4. Make Use of a colon to search from exact sites.
 |
| 15 Google Search Tricks and Tips to Make Web Browsing Easy. |
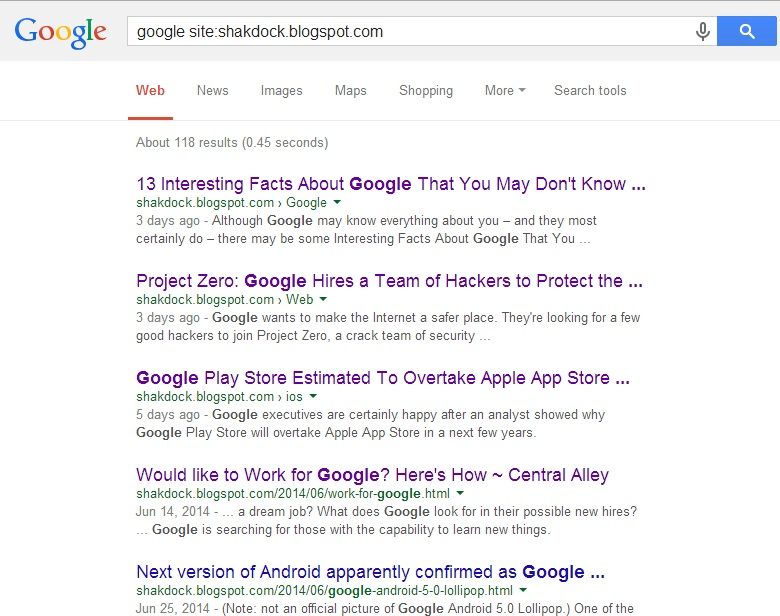
Occasionally you might want to search for something on a particular
website. Perhaps you want information on favourite Actor, or a particular
article on your desired website. By using the syntax revealed in the Image
above you can search only the website you denote when searching for a word.
5. Make use of your search history.
 |
| 15 Google Search Tricks and Tips to Make Web Browsing Easy. |
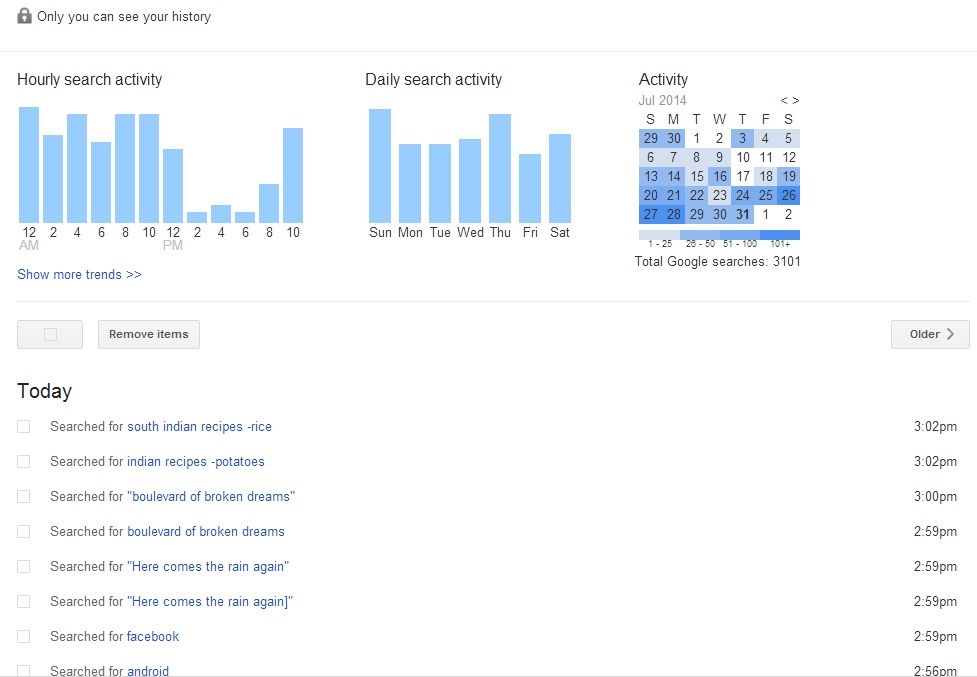
If you’ve searched for something before and want to discover
it again, you can always use your own search history. This necessitate of
having a Google account–which you always have if you use Android’s
Google PlayStore, Gmail, Google+, or any other Google service. Once you have that, you can
go to http://google.com/history to see all of your previous searches.
Also Read: Project Zero: Google Hires a Team of Hackers to Protect the Internet.
6. You can set a timer.
 |
| 15 Google Search Tricks and Tips to Make Web Browsing Easy. |
Where is the pasta timer when you need it? Don’t worry,
Google Search has got your back. If you search to set a timer then you can ask
the search engine to set a timer for you. This is awesome when you have the
laptop in the kitchen and you either can’t find your timer or it’s out of order.
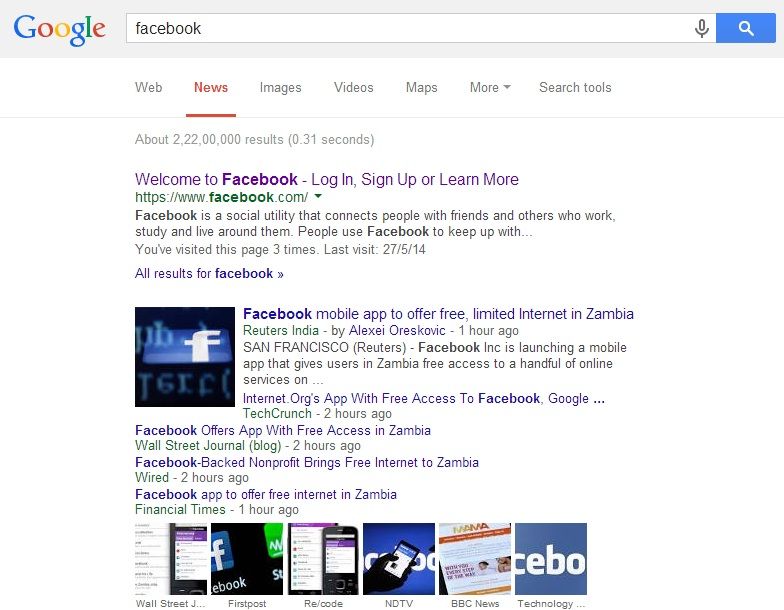
7. Find sports scores with no trouble.
 |
| 15 Google Search Tricks and Tips to Make Web Browsing Easy. |
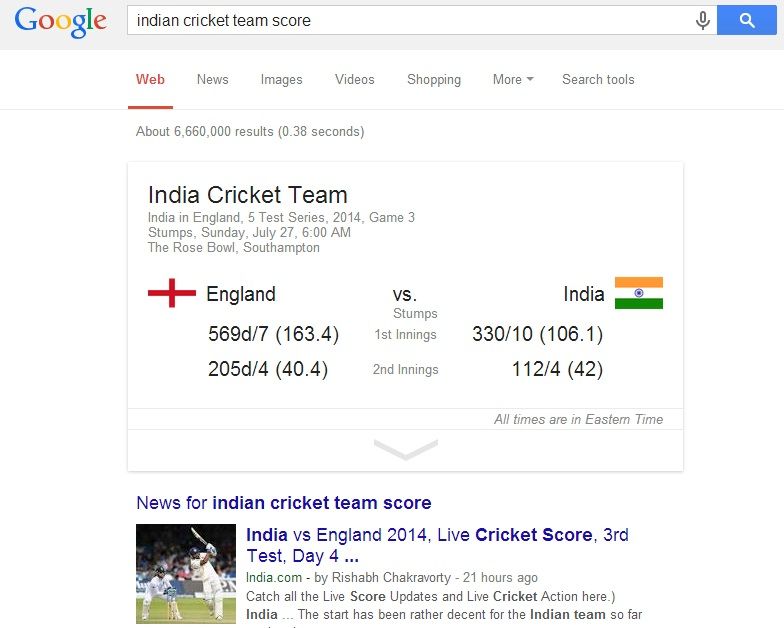
If you search for your favourite team and then insert the
word “score” to the end, Google will put a nice card up showing you the score
of the game your team is at present drawn in. This is very handy for finding up
to the minute scores on your favourite teams. If the game is over, then the
search will show you the last game played by that team. At least it is better than
waiting to see the score on the news afterwards.
8. You can define a word.
 |
| 15 Google Search Tricks and Tips to Make Web Browsing Easy. |
Google Search can be your own dictionary if you want. At any
point you can constantly ask Google to define a word for you and normally it’ll
tell you the meaning. This is enormous for checking spelling or for checking to
make sure you’re using a word accurately. It’s also useful for games like
Scrabble, Boggle, or other word games where someone is using a word that may or
may not exist.
9. Search for an item with a price range.
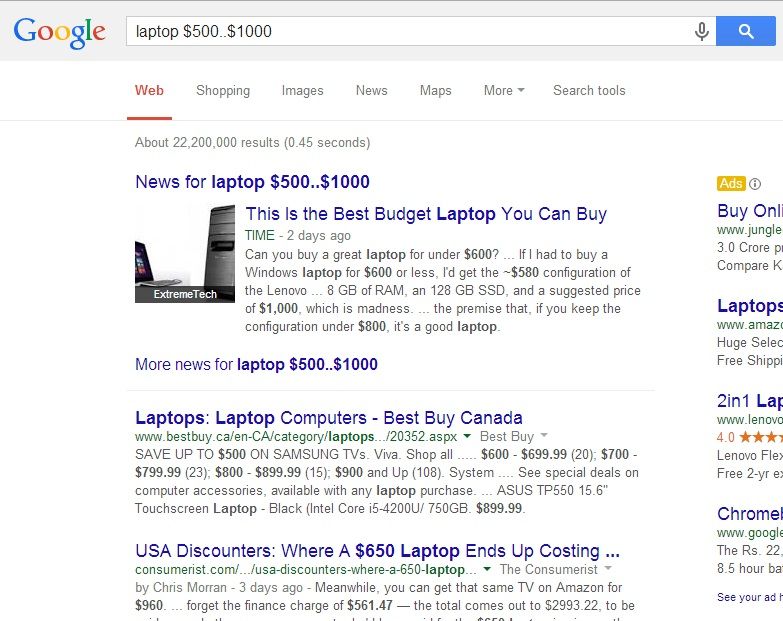 |
| 15 Google Search Tricks and Tips to Make Web Browsing Easy. |
If you use two periods (..) among two values, you can search
for items in that range. As you can see in the image, I searched for a laptop
that was between $500 and $1000. It won’t show laptops that charge less than $500
or more than $1000.
10. Google will always do the math for you.
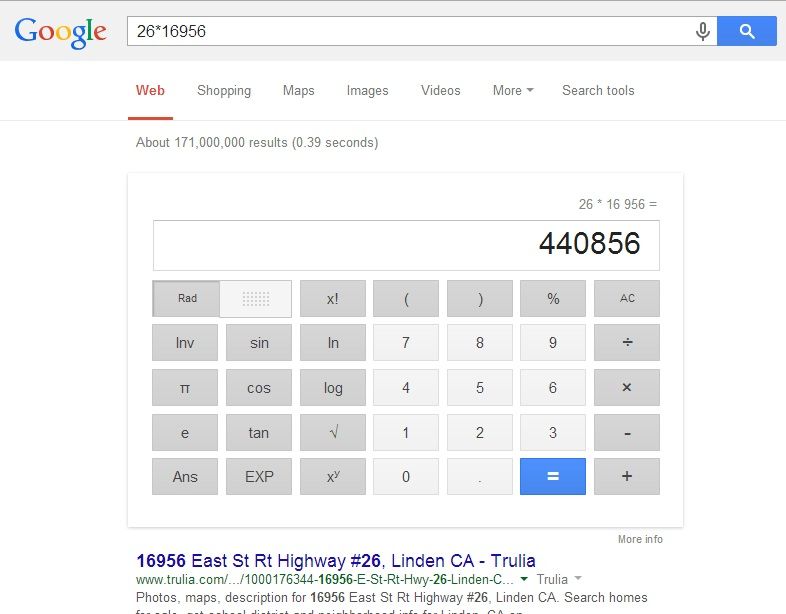 |
| 15 Google Search Tricks and Tips to Make Web Browsing Easy. |
Weak in performing math calculations? Don’t have enough time
to figure it out? Feeling too lazy to do it? Google Search has you covered. All you require
to do is type the math problem into the search beside an equal sign and a
calculator will show up with the answer to your problem.
Also Read: Alternative to iOS and Android: Ubuntu for Android.
11. Make use of an asterisk if you don’t know the word.
 |
| 15 Google Search Tricks and Tips to Make Web Browsing Easy. |
Sometimes you just can’t think of a word in a slogan you
want to search for. In that situation, you can make use of an asterisk (*) as a
substitute of the word and Google Search will try to search it out for you.
This is fine for universal applications but it’s utterly incredible when you’re
trying to search for song lyrics.
12. Google will always tell you the Weather.
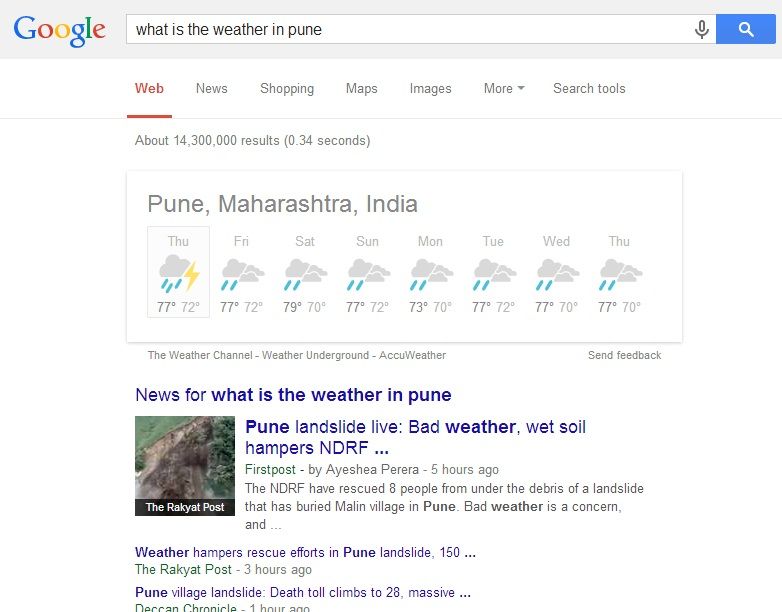 |
| 15 Google Search Tricks and Tips to Make Web Browsing Easy. |
An additional immediate skill that Google is talented of performing
is finding the weather for you. All you need to do is request Google what the
weather is and it will use your current location to show your weather. This is helpful
if you need to verify the weather quickly and without the harassment of starting
another website.
13. You can Convert Currencies too.
 |
| 15 Google Search Tricks and Tips to Make Web Browsing Easy. |
This one is quite self clarifying and really easy to do. You
can see the image above on how to do it and you can use Google to convert almost
every currency in the world. This is really handy for travellers who need a plan
of how much money they’ll have at their international tour or even for swift indication
to see how much something is in a different currency. It’s also amazing for customers
who shop globally and need to know if they have sufficient to buy something.
14. You can search for two things at a time.
 |
| 15 Google Search Tricks and Tips to Make Web Browsing Easy. |
By using the word OR among two search terms you can search
for both at a time. This is useful if you want to search for many things at
once, or if you’re not totally certain what you need to search for. If you’re
searching for numerous types of dress then why not search for both of them at a
time?
15. Last but not the Least, Keep it simple Silly.
 |
| 15 Google Search Tricks and Tips to Make Web Browsing Easy. |
Google Search has had a large number of upgrades over the
years to fill in the circumstance for you. If you try to search for things too exclusively,
then you’re not putting those upgrades to good use. As the old saying goes,
“less is more.”